My old fisher had a new alarm installed today, a newer Trek to replace the older 3g model and this one is much more, seems to be better in every respect. ![]()
Select to expand quoteUncleBob said..
My old fisher had a new alarm installed today, a newer Trek to replace the older 3g model and this one is much more, seems to be better in every respect. ![]()
Been a couple of days now with the new alarm in and I have to say, the older one was good but the new one is better, expanded parameters and faster response. Easier and faster, win win.
Select to expand quotecrustysailor said..
Is it still a separate SMS command at a time UB?
and can you rename inputs?
I believe that it is still a separate command at a time, works ok for the initial setting up because it confirms each and every command and yes I have just been busy renaming inputs to suit me. ![]()
If anyone would like the older 3G model, perhaps to see if it works for them, private message me with an offer that I might accept. ![]()
Stitched up a strop to hold clew of the mainsail close to the boom. Loose footed main with a wire outhaul and a 3 purchase tackle inside the boom. When the mainsail is hauled in the clew is about 70mm above the boom so the boom is 70mm lower than it needs to be. Probably been like this for 40 years!

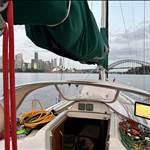
The fixed topping lift has been converted to adjustable and leads back to the rear of the cabin top. The second thinner blue line goes to the rear of the stackpack and when the topping lift is eased off this eases off as well so the stackpack end drops down. The topping lift is only used at the mooring. When reefing the boom will be held up by the boom strut.
Also lifted the Aries windvane bracket up 20mm at the rear. Now the horizontal frame is dead horizontal. Will not make any difference to it's performance it was just annoying me each day as I approached the boat. 20mm chopping board holds the rear up and then the whole lot was filled underneath with a fillet of epoxy and silica filler. Naturally, a thunderstorm came through an hour after I finished.

Boom strut and vang. The strut is laminated with 2 layers of birch ply and a couple of layups of epoxy/fibreglass cloth. I've added a pivot on the top of this one to allow the boom to move as much as it likes. It's just a SS bolt is a bit of SS tube.

For those interested, this is a rough cost for my new vessel. Figures are rounded up in most cases.
Yacht 6000
Self-tailing winches 3000
VHF radio 800
New UV strip and repair 700
Stack pack materials 300
Solar panels and reg 500
Windows 10 computer 200
Deck repair materials 1000
Paint 300
SS anchor chain 300
SS material for anchor 90
Multiplat anchor rope 240
Deck prisms 500
Battery 300
Cordage 200
Aries is off my old boat

very intetesting, thanks for posting. How many hours do you think you have put in?
She looks magnificent, a job well done!!
Select to expand quoteDrogueOne said..
very intetesting, thanks for posting. How many hours do you think you have put in?
She looks magnificent, a job well done!!
Thanks. It's been nearly 12 months. For the first 6 months I worked 7 days a week. Another 3 months 5 days a week and now I probably work 3 days a week. I don't work hard though, just office hours and I spend a lot of time talking to other boat bums!
I have forgotten about the costs for the engine. New alternator and starter motor $400
water separator/filter and copper pipe 150
Boom vang blocks 200
Thinking of buying noodles from Bunnings and put them around the protective wire all over the boat.In addition, fixed my dinghy with fiberglass kit repair from bunnings
Select to expand quoteSerb1980 said..
Thinking of buying noodles from Bunnings and put them around the protective wire all over the boat.In addition, fixed my dinghy with fiberglass kit repair from bunnings
Not sure why you would want to put those noodles over all lifelines - it will look really bad and only create excessive windage. The normal use for these is just on the upper lifelines adjacent to the cockpit to avoid them digging into your back when sitting up on the coaming. But we don't use noodles rather grey conduit which works well. Those lifelines can be loosened off a bit so that they are at a comfortable height. This needs a 316 stainless eyebolt and 316 eye nut put into the upper stanchion hole so that the tension of the upper lifeline going forward can be independent of the lifeline adjacent to the cockpit. Also may need fore and aft support struct on this stanchion as it will take the fore and aft load not the pushpit stanchion leg.
I made a new inner wooden step from scratch. First thing I have ever made from wood. Took me about three months and a few thousand dollars worth of tools: table saw, router, drills, bench drill, drop saw, circular saw, track.. Don't tell my wife.
if I was making it again I would do it differently.
also.. discovered varnish isn't compatible with epoxy. Drove me nuts.


Glory, that is sublime, you are now a cabinetmaker. What was the problem with varnish and epoxy?
Select to expand quotejbarnes85 said..
I made a new inner wooden step from scratch. First thing I have ever made from wood. Took me about three months and a few thousand dollars worth of tools: table saw, router, drills, bench drill, drop saw, circular saw, track.. Don't tell my wife.
if I was making it again I would do it differently.
also.. discovered varnish isn't compatible with epoxy. Drove me nuts.
Nice & now you have the machines your imagination is the limit, the discovery of gadgets like square drill bits for cutting mortise, plug cutters etc, and hoarding little bits of nice wood. It can be consuming but I'm sure if you occasionally produce a nice little some thing for the bride you're sins will be tolerated
Nice, you are good in making furniture!
Anyway, Tasman is ready, Newcastle here I come....

Select to expand quoter13 said..
Glory, that is sublime, you are now a cabinetmaker. What was the problem with varnish and epoxy?
So anywhere I epoxied (I used epoxy as a wood glue when glueing it all together) the varnish wouldnt go off and remained Tacky. I was using Feast Watson 500ml Spar Marine Varnish and West Systems epoxy.
I did some reading and initially thought it was the amine. However after leaving the epoxy for a few days I scrubbed it down with hot soapy water and a scotch bright to remove any amine but this still didnt work. After a coat of varnish those areas again remained tacky. My understanding is that it takes many many many days for epoxy to fully cure so the amine could still be an issue.
I also tried leaving the piece in the sun (for the UV). This also didnt fully work but did help.
I have also read that some varnish manufacturers publish that their varnish is not compatible with certain epoxy and that perhaps a two part varnish would have been compatible.
The quarter berth is an innerspring cot mattress and I've stitched up a leather cover from the leather of an old arm chair. The chart table I made as well and did not notice the coffee stain till after I checked the photo out later.

I have put some stuff on the main bulkhead to cover up bolt holes and slight defects in the clear finish.

Select to expand quoteRamona said..
The quarter berth is an innerspring cot mattress and I've stitched up a leather cover from the leather of an old arm chair. The chart table I made as well and did not notice the coffee stain till after I checked the photo out later.
I have put some stuff on the main bulkhead to cover up bolt holes and slight defects in the clear finish.
Hi Ramona,
I was just thinking how the doghouse looks a lot like Plum Crazy's. Do you know if it is from the same mould?
could be a story there.

Select to expand quoteRingle said..Ramona said..
The quarter berth is an innerspring cot mattress and I've stitched up a leather cover from the leather of an old arm chair. The chart table I made as well and did not notice the coffee stain till after I checked the photo out later.
I have put some stuff on the main bulkhead to cover up bolt holes and slight defects in the clear finish.
Hi Ramona,
I was just thinking how the doghouse looks a lot like Plum Crazy's. Do you know if it is from the same mould?
could be a story there.
What a beauty
Select to expand quoteRingle said..Ramona said..
T
Hi Ramona,
I was just thinking how the doghouse looks a lot like Plum Crazy's. Do you know if it is from the same mould?
could be a story there.
My hull is fibreglass, straight from the Swarbick moulds. Everything else is timber.
Select to expand quoteRamona said..Ringle said..Ramona said..
T
Hi Ramona,
I was just thinking how the doghouse looks a lot like Plum Crazy's. Do you know if it is from the same mould?
could be a story there.
My hull is fibreglass, straight from the Swarbick moulds. Everything else is timber.
Lovely feel belowdecks with that, I imagine.
After my 4 yo (not cheap) Waeco fridge/freezer stopped working, the compressor ran non-stop, I did some googling & found it's a common problem. So I replaced it's thermister, which is a fancy term for the sender, this didn't work properly either although it was a small improvement - problem being it was still sending the incorrect temperature!!
While I was replacing the Waeco sender I stuck another one in with it which is connected to my Pi4 so I can monitor what is going on. This is how I found it wasn't cycling properly.
So, I bypassed the waeco circuitry & installed a separate controller, with it's own sender (same as I'm using for my fridge & hot water) - works great.
I can switch between the new controller & the original Waeco if need be - it might come good one day!!
You can see the difference in temperatures - Waeco showing +18 when it is actually -3.3C

OK this is not my boat but my mates alloy Cole 42. I thought I would post a photo after being inspired by the mast corrosion post. It was on the slips last week and he actually had to weld in a small plate where a pin hole had developed near an anode mounting point. Sometime in the past there must have been a period when the anode was missing and the center strap [mild steel] caused the problem. He welded it with a mig welder. When the mast was out he did some welding at the top and spreaders and the base. The new cabin, pushpit and pulpit and stanchions, ladder etc were all welded with the mig welder on the fore-deck at the mooring. He would start early morning before the breeze got up so the argon would not be blown away. The two hatches on the foredeck are his latest projects. He has folded the alloy over and shaped them so they follow the contours of the deck. The cabin is also a work of art and transforms the appearance of what was once a flushdeck IOR racer.

This is before the alloy hatch covers.

Select to expand quoteRamona said..
OK this is not my boat but my mates alloy Cole 42. I thought I would post a photo after being inspired by the mast corrosion post. It was on the slips last week and he actually had to weld in a small plate where a pin hole had developed near an anode mounting point. Sometime in the past there must have been a period when the anode was missing and the center strap [mild steel] caused the problem. He welded it with a mig welder. When the mast was out he did some welding at the top and spreaders and the base. The new cabin, pushpit and pulpit and stanchions, ladder etc were all welded with the mig welder on the fore-deck at the mooring. He would start early morning before the breeze got up so the argon would not be blown away. The two hatches on the foredeck are his latest projects. He has folded the alloy over and shaped them so they follow the contours of the deck. The cabin is also a work of art and transforms the appearance of what was once a flushdeck IOR racer.
This is before the alloy hatch covers.
Wow credit to him. Remember you pointing this boat out to me when I looked at your Currawong. Bet the below deck transformation will be the biggest with lots of headroom now.
Select to expand quotejulesmoto said..Ramona said..
OK this is not my boat but my mates alloy Cole 42. I thought I would post a photo after being inspired by the mast corrosion post. It was on the slips last week and he actually had to weld in a small plate where a pin hole had developed near an anode mounting point. Sometime in the past there must have been a period when the anode was missing and the center strap [mild steel] caused the problem. He welded it with a mig welder. When the mast was out he did some welding at the top and spreaders and the base. The new cabin, pushpit and pulpit and stanchions, ladder etc were all welded with the mig welder on the fore-deck at the mooring. He would start early morning before the breeze got up so the argon would not be blown away. The two hatches on the foredeck are his latest projects. He has folded the alloy over and shaped them so they follow the contours of the deck. The cabin is also a work of art and transforms the appearance of what was once a flushdeck IOR racer.
This is before the alloy hatch covers.
Wow credit to him. Remember you pointing this boat out to me when I looked at your Currawong. Bet the below deck transformation will be the biggest with lots of headroom now.
It had full headroom before but not over the galley. This whole cabin is just to get headroom there! Now the saloon feels like a ballroom!
Check out the fit on the two deck hatches. Lot's of hours and plenty of whinging to get that. Deck paint is on now.

Select to expand quoteRamona said..julesmoto said..Ramona said..
OK this is not my boat but my mates alloy Cole 42. I thought I would post a photo after being inspired by the mast corrosion post. It was on the slips last week and he actually had to weld in a small plate where a pin hole had developed near an anode mounting point. Sometime in the past there must have been a period when the anode was missing and the center strap [mild steel] caused the problem. He welded it with a mig welder. When the mast was out he did some welding at the top and spreaders and the base. The new cabin, pushpit and pulpit and stanchions, ladder etc were all welded with the mig welder on the fore-deck at the mooring. He would start early morning before the breeze got up so the argon would not be blown away. The two hatches on the foredeck are his latest projects. He has folded the alloy over and shaped them so they follow the contours of the deck. The cabin is also a work of art and transforms the appearance of what was once a flushdeck IOR racer.
This is before the alloy hatch covers.
Wow credit to him. Remember you pointing this boat out to me when I looked at your Currawong. Bet the below deck transformation will be the biggest with lots of headroom now.
It had full headroom before but not over the galley. This whole cabin is just to get headroom there! Now the saloon feels like a ballroom!
Check out the fit on the two deck hatches. Lot's of hours and plenty of whinging to get that. Deck paint is on now.
Jeweller's tolerances right there on those hatches.
Bought a kit to make my own AIS transponder - arrived from Spain & got it installed today!!


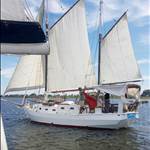
Also got my staysail back from the sailmaker - went from hanks to a furler


Just in time for some Chrissy Cruising!! :)
Lazz the home made ais is impressive but the inner and outer staysails with the red Uv covers is a stand out !