Aaaah, now I get it! So the end result will be that it is mounted on a non flat surface hence requiring shaping to the underside, the laminate standoff will be no larger than the winch itself, and will provide sufficient height to level the chain to the bowsprit?
Does the wooden bowsprit need protection from the chain, or is the end result high/sideways enough not to rub?
You have to take piccies and post when it is mounted!
Select to expand quoteShaggybaxter said..
Aaaah, now I get it! So the end result will be that it is mounted on a non flat surface hence requiring shaping to the underside, the laminate standoff will be no larger than the winch itself, and will provide sufficient height to level the chain to the bowsprit?
Does the wooden bowsprit need protection from the chain, or is the end result high/sideways enough not to rub?
You have to take piccies and post when it is mounted!
the bow roller is to the side of the bow spit timber Shaggy. The anchor chain run parallel to the bow spit timber
Ill be using the starboard side bow roller for my anchor winch. In this photo the tape measures sitting on the roller the chain will run parallel to the timber.
This photos was taken ![]()
![]() over a year ago talk about procrastination Shaggy
over a year ago talk about procrastination Shaggy
The Atlantic I have is the 850 which is 600 watt but it uses the same winch as the 1000 watt motor Atlantic and also the 1200 watt with hardly any mods the 1000 watt motor fits and I know where I can get one if needed later so this cost my all up if I bought the 1000 watt motor under $1600 , where as to buy out of the shops I'm looking at $3300 for the same thing.
out of my reach


Started on it this morning had some fast cure hardener so i mixed that up with resin and glue fillet
By late this afternoon it had gone off and i cleaned it up and followed the holes through the deck and dropped in my anchor winch
Next weekend in finish it off on deck and start prepping the deck for paint and non skid .
The lower section of the winch can wait there's no hurry compared to Hull sea cocks and get the deck painted and non skid as well as keep going with the main mast during the week after work

looks good HG , do they have an anchor well lid or flap ? or have you glassed it up ?
perfect day for it again weather wise !!
Select to expand quoteSandS said..
looks good HG , do they have an anchor well lid or flap ? or have you glassed it up ?
perfect day for it again weather wise !!
its long gone Sands makes it to hard to fit a anchor winch properly for me any way . Ill be making my own slowly slowly till it works perfectly.
What needs to happen is any thing out side while it on the hard as you know what happens if you do stuff on the water not to good for the environment
I don't want to contaminate mosquito ridden local swaps. Much like the nature strip along nepean high way its just a free way for rodents, foxes and rabbits rubbish and some strange men some times , as far as I'm concerned .
![]()
Id rather see the bay much the same as the strand in Townsville what a draw card that would be and could even envision a mono rail running the full length of the port Philip bay coast with a return line running along east link back to the city


But I live in forwards backwards land
Opps I got a bit carried away here
The most livable city who pays that man to say crud like that
Select to expand quoteHG02 said...
Started on it this morning had some fast cure hardener so i mixed that up with resin and glue fillet
By late this afternoon it had gone off and i cleaned it up and followed the holes through the deck and dropped in my anchor winch
Next weekend in finish it off on deck and start prepping the deck for paint and non skid .
The lower section of the winch can wait there's no hurry compared to Hull sea cocks and get the deck painted and non skid as well as keep going with the main mast during the week after work
HG, that looks like it was made for it, which I suppose it is! [:) Seriously, that looks excellent, I wish I had your knack for this stuff!
Select to expand quoteandy59 said..
Nice job HG
Cheers Andy
Ive some finishing off to do sanding filler and then Ill start on the deck paint and non skid . Id really like to fit a forward hatch if I can afford it before paint , see how the boat dollars go over the next couple of months, I guess ![]()
![]()
Re-whipped all my lines.
Cheated i remelted the ends then this time i used self amalgamating tape.![]()
Select to expand quoteslammin said...
Re-whipped all my lines.
Cheated i remelted the ends then this time i used self amalgamating tape.![]()
How about some pics of those whipped lines
You know HG you could make one from scratch a bit of ply some poly carbonate and some epoxy
You can do everything else![]()
Select to expand quoteandy59 said...
You know HG you could make one from scratch a bit of ply some poly carbonate and some epoxy
You can do everything else![]()
No ply there. Andy it wont rot or leak![]()
Great thanks shaggybaxter! Had a good sail and did a couple of tacks with full cockpit covers on.....never had selftaylors on my past yachts such a luxury ! Polished up the original cabin selftaylors so now I have 4 nice working winches.
Next I'm getting a beanbag seat for behind the wheel to sit on so I'm nice and comfy.!

Select to expand quoteShaggybaxter said..southace said..
Only took me 6months to fit my new self Taylor's. They wont be coming of in a hurry that's for sure. These winches are a size up from the old 27s can't wait to take her for a test sail!


Status update Southace? Have you taken her out yet? How are the new winches?
I didn't really think to take pic's.
I found one in a pic of my wife. I'll save you and edit her out. LOL Hope she doesn't read seabreeze......

First undercoat done and filler where needed sanded ready for 2nd undercoat. Took some getting used to but its now a good base to build up the paint job.

First undercoat done and filler where needed sanded ready for 2nd undercoat. Took some getting used to but its now a good base to build up the paint job.
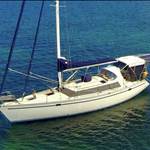
Today was a big day, the keel and the hydraulics are in! Fully extended the draft is 3mtrs (eek), but when lifted the draft is a more manageable 1.2mtrs. Part of the design of the keel is a release valve assembly, if it is run aground the keel will fold backwards rather than the full shock load having to be absorbed through the frames.
Splash date is the 5th October, I will be on the ground on the 12th to kick the tyres. Really can't wait now, the wait is killing me. ![]()

Hi Shags
New to Yachting..........But a Great machine, Have "Youtubed" Pogo....what a buzz !!!!!!!!!!!!!!
Really a fantastic yacht Shaggy. Your excitement level must have your heart palpitating.
That keel doesn't pivot into a slot in the hull does it? Looks to me like it just pivots back parallel to the hull and remains completely outside the hull all the time.
Is that the case??
Thanks guys, I feel like I'm watching a pot to boil, time is moving soooo slowly.
Cisco, yes you are bang on, the keel folds backward and does not penetrate the hull, but sits outside, the trailing edge almost touching the underside of the hull. So, it kinda ends up looking like an old full length keel ![]() The saildrive sits just behind the keel when it is in its up position, so you can motor effectively, but I cant have sails up when the keel is up of course!
The saildrive sits just behind the keel when it is in its up position, so you can motor effectively, but I cant have sails up when the keel is up of course!
Select to expand quoteShaggybaxter said..
Today was a big day, the keel and the hydraulics are in! Fully extended the draft is 3mtrs (eek), but when lifted the draft is a more manageable 1.2mtrs. Part of the design of the keel is a release valve assembly, if it is run aground the keel will fold backwards rather than the full shock load having to be absorbed through the frames.
Splash date is the 5th October, I will be on the ground on the 12th to kick the tyres. Really can't wait now, the wait is killing me. ![]()
Yep..., that's... wow. Incredible.
You gonna run her into a sand bank to make sure the release valve works? ![]()
Select to expand quoteSandS said..
Looking good guitz ..... What type of filler are you using ?
I using West Sustem epoxy with micro ballons. First batch i made I didn't put enough in to thicken it because i was worried it was going to go off and it just slowly sagged. Very frustrating as i kept going round the boat with my spatula getting it right again. Eventually I got the heat gun to warm it up from about 10 inches away and it went off. Once sanded back It revealed the areas I will need to fill again. It'e all a learning curve and not as straight forward as the traditional methods but once done will be much less annual maintenance.
.....And I must say Shaggybaxter, your yacht is amazing! 5th October will be here in no time.
Hi Guitz,
Showing my ignorance here (again), but how does microballons thicken the resin? To me it seems like it would add more bulk, but make it less dense? Or is it me being the dense one???
And using the heat gun to get it to go off related to the microballons?
Excuse the dumb questions........
Dr Rog, I might let you guys try this out for me, excuse me if I hide at home when you do, just ring me and let me know how it goes ![]()
Select to expand quoteShaggybaxter said..
Hi Guitz,
Showing my ignorance here (again), but how does microballons thicken the resin? To me it seems like it would add more bulk, but make it less dense? Or is it me being the dense one???
And using the heat gun to get it to go off related to the microballons?
Excuse the dumb questions........
Dr Rog, I might let you guys try this out for me, excuse me if I hide at home when you do, just ring me and let me know how it goes ![]()
Adding the micro balloons is like adding wood dust to ordinary filler......add enough to the goop until it's thick enough not to run. Also the micro balloons make the epoxy easy to sand. And the heat gun is not related to the micro balloons, it warms the goop to speed up the chemical reaction between the epoxy resin and hardener.
Ice cream is the texture you want .... Micro ballons is exactly what it explains......mix it with resin and it turns to a areo bar Yum !
micro spheres are even better for glueing stuff together. Polyurathne fixteck 15 is even better but that's only a one pak!