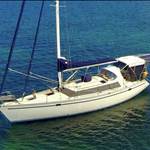
Cripes amazing Lazzz. Going from last photo to first;
Assume you have all that 1190watts regulated.
Hot water system looks sublime.
Workshop cleanout has more gear than some chandlers..........so a few hundred kgs less displacement of the yacht?
Polyflex mounts and coupling - can't go wrong.
The timber toe rail and glue - looks like ply and maybe an aliphatic resin wood glue? Maybe not as it is gluing wood to paint? Is this going to stand up long term even if it is varnished marine ply with the edge grain exposed? Only asking as I have to do a repair on a teak strip screwed down on the foredeck gunwales which has split, and if that glue in the photo is some good stuff I am not aware of will use it rather than mixing up epoxy glue.
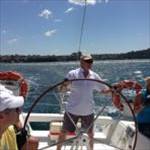
And copy my snubber! Don't get me started on snubbers I have snapped 3 now in 45 knot + winds and gone from 12 to 14 mm next will be 16mm nylon! And the door you have the can crusher won't last long if your crushing cans on it. ![]()

Between gales I have managed to continue advancing back (forward) on the teak restoration while also catching 8 plump King George whitting and a couple of thumper southern calmari squid.


"I now have 1190 watts of solar + wind gen feeding my batteries"
Wow, that is just awesome! Pity you cant connect it back to the grid and get a rebate for any excess power lol![]()
Select to expand quotesouthace said..
Between gales I have managed to continue advancing back (forward) on the teak restoration while also catching 8 plump King George whitting and a couple of thumper southern calmari squid.
Select to expand quotesouthace said..
Between gales I have managed to continue advancing back (forward) on the teak restoration while also catching 8 plump King George whitting and a couple of thumper southern calmari squid.
Hi Southace,
You certainly seem to have mastered the sanding technique.
How do you manage to not to scratch the timber with the grinder? I am guessing you are using a very fine grinding wheel/paper.
Are you protecting the fibreglass, stainless steel and rubber with masking tape?
What finish are you using?
Yes mask up stainless and gelcoat where required, the 120grit disk is 125mm on a 150mm pad . I'm bacicly removing the old Silkens back to bare teak finish. I have chiseled the raised sikaflex down and will be re-filling some areas that have failed before sanding again to final finish.

Select to expand quoter13 said..
Cripes amazing Lazzz. Going from last photo to first;
Assume you have all that 1190watts regulated.
Hot water system looks sublime.
Workshop cleanout has more gear than some chandlers..........so a few hundred kgs less displacement of the yacht?
Polyflex mounts and coupling - can't go wrong.
The timber toe rail and glue - looks like ply and maybe an aliphatic resin wood glue? Maybe not as it is gluing wood to paint? Is this going to stand up long term even if it is varnished marine ply with the edge grain exposed? Only asking as I have to do a repair on a teak strip screwed down on the foredeck gunwales which has split, and if that glue in the photo is some good stuff I am not aware of will use it rather than mixing up epoxy glue.
1190 watts sure is regulated!! The rear panels & wind gen go through a Redarc Dual Input Multi-Stage 12V Battery Charger BCDC1250D which does a fantastic job!! Thanks to Jode5 here for convincing me to go this way - It's the beez kneez!! The new panels are looked after by a 60A MPPT eSmart3 Solar Charge Controller. I haven't got this wired in yet, waiting on some circuit breakers, but I know it works good.


I actually didn't throw much away from the workshop - most of it I "really need or could come in handy one day"!
Love the Polyflex stuff - Ozzy, very easy to deal with & a great product.
The toe rails are just cheap pine from the Green Shed - I wanted to see if it would work OK & I now have templates for when they fail. They are not glued to paint but bolted on & that "glue in the photo" is actually lubricant for tapping threads.Select to expand quotesouthace said..
And copy my snubber! Don't get me started on snubbers I have snapped 3 now in 45 knot + winds and gone from 12 to 14 mm next will be 16mm nylon! And the door you have the can crusher won't last long if your crushing cans on it. ![]()
I didn't copy your snubber, didn't even know you had one!!
Mine is 16mm & the garbage bin door is pretty solid - thanks for the heads up but I'll go steady on the can crushing. Probably won't get used as much as yours!!!!! ![]()
What are you using for the sanding?? It's a good thing we both love working on boats :)
Select to expand quoteLazzz said..
What are you using for the sanding?? It's a good thing we both love working on boats :)
I'm using 18volt cordless buff/sander polisher on super low speed.
Its a great light weight buff I managed to polish a 65 foot hull last week on 6 charged battery's!

Sanded off the old antifoul and scraped off some degraded vinylester coating with bladed scraper, ground out the 100'ish small blisters, applied first barrier coat of Wattyl Epinamel PR250 and starting on fairing using Wattyl Seapro EFC , feel like I'll regret fairing the whole hull when I have to go back to sanding, but we'll see.
The PO had gouged out a section of the skeg to help with removing the prop shaft and left it open, which made for a weak point which had a lot of flex, so that's been filled, now there's no obvious flex, along with some minor rudder repairs.
Also had the engine cooling flushed with acid (was badly clogged) and the old rusty and cracked mixing elbow replaced with a HDI GMkit stainless version, all new hoses and clamps, thermostat, anodes, electric fuel pump etc etc.
With some concentrated effort she should be back in the water later next week.


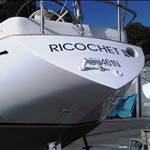
Ricochet 2
Cutting out the rotten plywood under the teak. This is the worst side. Starboard side has a relatively small section in the same place but the toerail has to come off. Notice how thin the plywood is. It's the old 5/16ths mahogany. Will be using 9mm to replace. Looks like there is a thin ply under the teak that is not glued to the base ply. The teak was stapled to that and water has got through in the usual places. The toerail was screwed down with no sealant, water has obviously gotten into the end grain of the ply at the beam where most of the water would lay. Bit of rot in the inwale at the bottom of the picture which is an easy repair. It looks like the Swarbick hull had a fibreglass inwale base from the factory and the shipwrights in Adelaide simply built the deck on that. All the teak deck is coming off and there will be a couple of layups of cloth and epoxy. The cockpit teak is all new. I reckon two sheets of ply will do the job but will pick up 3 sheets tomorrow.

Note the yacht just ahead of the mast. This is my mates Cole aluminium 42 sporting it's new aluminium cabin. It's a work of art. This is the yacht we brought down from Sydney with the glass house over the cockpit. That was ripped off and she spent several years with the original flush deck arrangement. There was limited headroom at the galley so my mate got busy! It's enormous inside now.
Select to expand quoteRamona said..
Ricochet 2
Cutting out the rotten plywood under the teak. This is the worst side. Starboard side has a relatively small section in the same place but the toerail has to come off. Notice how thin the plywood is. It's the old 5/16ths mahogany. Will be using 9mm to replace. Looks like there is a thin ply under the teak that is not glued to the base ply. The teak was stapled to that and water has got through in the usual places. The toerail was screwed down with no sealant, water has obviously gotten into the end grain of the ply at the beam where most of the water would lay. Bit of rot in the inwale at the bottom of the picture which is an easy repair. It looks like the Swarbick hull had a fibreglass inwale base from the factory and the shipwrights in Adelaide simply built the deck on that. All the teak deck is coming off and there will be a couple of layups of cloth and epoxy. The cockpit teak is all new. I reckon two sheets of ply will do the job but will pick up 3 sheets tomorrow.
Note the yacht just ahead of the mast. This is my mates Cole aluminium 42 sporting it's new aluminium cabin. It's a work of art. This is the yacht we brought down from Sydney with the glass house over the cockpit. That was ripped off and she spent several years with the original flush deck arrangement. There was limited headroom at the galley so my mate got busy! It's enormous inside now.
Gees!
looks like a bit more than a teak and deck problem there!
i would probably know that yacht if its originally from Adelaide but can't from the pics.
is that cairns inlet? plenty of wrecks go up there to die?
Select to expand quoteWander66 said..
Sanded off the old antifoul and scraped off some degraded vinylester coating with bladed scraper, ground out the 100'ish small blisters, applied first barrier coat of Wattyl Epinamel PR250 and starting on fairing using Wattyl Seapro EFC , feel like I'll regret fairing the whole hull when I have to go back to sanding, but we'll see.
The PO had gouged out a section of the skeg to help with removing the prop shaft and left it open, which made for a weak point which had a lot of flex, so that's been filled, now there's no obvious flex, along with some minor rudder repairs.
Also had the engine cooling flushed with acid (was badly clogged) and the old rusty and cracked mixing elbow replaced with a HDI GMkit stainless version, all new hoses and clamps, thermostat, anodes, electric fuel pump etc etc.
With some concentrated effort she should be back in the water later next week.
what's the make? Dunc?
Select to expand quotesouthace said..Ramona said..
Ricochet 2
Cutting out the rotten plywood under the teak. This is the worst side. Starboard side has a relatively small section in the same place but the toerail has to come off. Notice how thin the plywood is. It's the old 5/16ths mahogany. Will be using 9mm to replace. Looks like there is a thin ply under the teak that is not glued to the base ply. The teak was stapled to that and water has got through in the usual places. The toerail was screwed down with no sealant, water has obviously gotten into the end grain of the ply at the beam where most of the water would lay. Bit of rot in the inwale at the bottom of the picture which is an easy repair. It looks like the Swarbick hull had a fibreglass inwale base from the factory and the shipwrights in Adelaide simply built the deck on that. All the teak deck is coming off and there will be a couple of layups of cloth and epoxy. The cockpit teak is all new. I reckon two sheets of ply will do the job but will pick up 3 sheets tomorrow.
Note the yacht just ahead of the mast. This is my mates Cole aluminium 42 sporting it's new aluminium cabin. It's a work of art. This is the yacht we brought down from Sydney with the glass house over the cockpit. That was ripped off and she spent several years with the original flush deck arrangement. There was limited headroom at the galley so my mate got busy! It's enormous inside now.
Gees!
looks like a bit more than a teak and deck problem there!
i would probably know that yacht if its originally from Adelaide but can't from the pics.
is that cairns inlet? plenty of wrecks go up there to die?
No that's Greenwell Point, NSW. Boat was built in Adelaide and did compete in the Adelaide to Port Lincoln race but spent most of her racing career on Port Phillip Bay.
Select to expand quoteLazzz said..r13 said..
Cripes amazing Lazzz. Going from last photo to first;
Assume you have all that 1190watts regulated.
Hot water system looks sublime.
Workshop cleanout has more gear than some chandlers..........so a few hundred kgs less displacement of the yacht?
Polyflex mounts and coupling - can't go wrong.
The timber toe rail and glue - looks like ply and maybe an aliphatic resin wood glue? Maybe not as it is gluing wood to paint? Is this going to stand up long term even if it is varnished marine ply with the edge grain exposed? Only asking as I have to do a repair on a teak strip screwed down on the foredeck gunwales which has split, and if that glue in the photo is some good stuff I am not aware of will use it rather than mixing up epoxy glue.
1190 watts sure is regulated!! The rear panels & wind gen go through a Redarc Dual Input Multi-Stage 12V Battery Charger BCDC1250D which does a fantastic job!! Thanks to Jode5 here for convincing me to go this way - It's the beez kneez!! The new panels are looked after by a 60A MPPT eSmart3 Solar Charge Controller. I haven't got this wired in yet, waiting on some circuit breakers, but I know it works good.
I actually didn't throw much away from the workshop - most of it I "really need or could come in handy one day"!
Love the Polyflex stuff - Ozzy, very easy to deal with & a great product.
The toe rails are just cheap pine from the Green Shed - I wanted to see if it would work OK & I now have templates for when they fail. They are not glued to paint but bolted on & that "glue in the photo" is actually lubricant for tapping threads.southace said..
And copy my snubber! Don't get me started on snubbers I have snapped 3 now in 45 knot + winds and gone from 12 to 14 mm next will be 16mm nylon! And the door you have the can crusher won't last long if your crushing cans on it. ![]()
I didn't copy your snubber, didn't even know you had one!!
Mine is 16mm & the garbage bin door is pretty solid - thanks for the heads up but I'll go steady on the can crushing. Probably won't get used as much as yours!!!!! ![]()
What are you using for the sanding?? It's a good thing we both love working on boats :)
Ok thanks, for the toe rail timber all makes sense now.
Hi ramona
Will be watching Ricochet come back to life with pleasure.
You have a lot of work and decisions ahead.
As to, will those winches stay there?
Different cabin,?
Do you think it is worth putting a call out for volunteers?
You know what the say about "many hands"
Wishing you success at every step
gary
Select to expand quotegarymalmgren said..
Hi ramona
Will be watching Ricochet come back to life with pleasure.
You have a lot of work and decisions ahead.
As to, will those winches stay there?
Different cabin,?
Do you think it is worth putting a call out for volunteers?
You know what the say about "many hands"
Wishing you success at every step
gary
Thanks Gary, most of those winches, at least 4, will go on the cabin top and the reefing will all be done from the cockpit. Interestingly the winches are not through bolted to the deck. The cabin will remain the same but I'm thinking of tossing the instrument binnacle which in the present location will foul the winch handles. I have Tack Tick wind and depth sounder instruments which will be better at the wheel.
While it looks like a lot of work it really is straight forward stuff. The only problem I can see is the rain forecast for the next few days. I've replaced the deck on a 40 footer before and this is a much simpler and smaller job. I'm in no rush but I will have to buy all the materials this week because the local crowd close up for Christmas around here.
There will be a working bee required refitting the toe rail. That is going to be a handful.
Select to expand quoteWander66 said..
Sanded off the old antifoul and scraped off some degraded vinylester coating with bladed scraper, ground out the 100'ish small blisters, applied first barrier coat of Wattyl Epinamel PR250 and starting on fairing using Wattyl Seapro EFC , feel like I'll regret fairing the whole hull when I have to go back to sanding, but we'll see.
The PO had gouged out a section of the skeg to help with removing the prop shaft and left it open, which made for a weak point which had a lot of flex, so that's been filled, now there's no obvious flex, along with some minor rudder repairs.
Also had the engine cooling flushed with acid (was badly clogged) and the old rusty and cracked mixing elbow replaced with a HDI GMkit stainless version, all new hoses and clamps, thermostat, anodes, electric fuel pump etc etc.
With some concentrated effort she should be back in the water later next week.
Hi Wander,
That looks great, how did you sand the AF off, I'm about to embark on a similar project next week. I have bought a Mirka orbital and dust extractor, wish me luck! I want to restore my underneath to a clean substrate, apply a barrier coat and lay on some hard AF with the thought of a burnish at the end. I'll post up some photos as the job progresses!
cheers Richard
Select to expand quoteLazzz said..
This thread is one of my favourites on this forum and I enjoy seeing what others are doing to their boats - sometimes giving me ideas for extra things to do to mine, sometimes giving me ideas on different ways to do stuff!! I used to really enjoy following Haydn's progress with his boat & miss the, usually daily, posts.
I haven't posted here much lately but I am always doing something. A lot of boring stuff such as painting, end for ending anchor rode, new engine mounts etc but some things are not so boring - for me at least.
Here's a bit of a catch up and I hope I can share a bit more in future:
Installed a timber toe rail

Looks good all varnished up!!

Made a thingy to raise & lower the duckboard with a push of a button - bit of overkill but I had a spare linear actuator lying around!!

New engine mounts & coupling

Cleaned out the workshop/ sail locker - didn't think I had so much "stuff" in there!!!

Gave it a wash & came up pretty good - didn't even need a paint!!

I bought a new engine water pump for a spare - if this fails it's too hard to Mcgyver something & they're not easy to get hold of so good to have a spare!!

I made a copper coil to run the engine coolant through to go inside my hot water tank. I originally only had a 240v element to heat the water but this coil exceeded my expectations!! I also put a 12v element in the tank as well while I had it out.

Not the prettiest but all works great - 45 litres of hot water after 1/2 hr of motoring :)

I got the idea off Southace on here to install a can crusher - I just have to get used to beer from cans instead of glass!!

Made a new anchor snubber - how did we get on without YouTube?? I had to trim the ends when I was back on the boat - didn't have the gear at home.

And finally todays job - which started all this!!!!!!!!!!!!!!
Installed 2 new solar panels on the bimini

I now have 1190 watts of solar + wind gen feeding my batteries.

You've been busy Lazzz! I agree, this is one of my favorite topics too, I love to see what people are getting up to and getting ideas and gaining motivation from them. Southace's diesel heater install got me inspired and I'm really happy with the result. That's a good reminder about the water pump, I've had that in the back of my mind for a while and haven't done anything about it yet.
I'm envious that you actually have the space to have a workshop :) and laughed my head off at the pile of stuff on your foredeck, why is it that even the simplest jobs can turn into this much mess.
The toerail has come up good, what timber did you use?
I have one 100 watt solar panel, and I haven't even installed it yet, so I'm not going to say any more about your squillion watts of sunshinetricity...
Select to expand quotesouthace said..Wander66 said..
Sanded off the old antifoul and scraped off some degraded vinylester coating with bladed scraper, ground out the 100'ish small blisters, applied first barrier coat of Wattyl Epinamel PR250 and starting on fairing using Wattyl Seapro EFC , feel like I'll regret fairing the whole hull when I have to go back to sanding, but we'll see.
The PO had gouged out a section of the skeg to help with removing the prop shaft and left it open, which made for a weak point which had a lot of flex, so that's been filled, now there's no obvious flex, along with some minor rudder repairs.
Also had the engine cooling flushed with acid (was badly clogged) and the old rusty and cracked mixing elbow replaced with a HDI GMkit stainless version, all new hoses and clamps, thermostat, anodes, electric fuel pump etc etc.
With some concentrated effort she should be back in the water later next week.
what's the make? Dunc?
Nope Carter 33 Passage
Select to expand quoteStockie said..Wander66 said..
Sanded off the old antifoul and scraped off some degraded vinylester coating with bladed scraper, ground out the 100'ish small blisters, applied first barrier coat of Wattyl Epinamel PR250 and starting on fairing using Wattyl Seapro EFC , feel like I'll regret fairing the whole hull when I have to go back to sanding, but we'll see.
The PO had gouged out a section of the skeg to help with removing the prop shaft and left it open, which made for a weak point which had a lot of flex, so that's been filled, now there's no obvious flex, along with some minor rudder repairs.
Also had the engine cooling flushed with acid (was badly clogged) and the old rusty and cracked mixing elbow replaced with a HDI GMkit stainless version, all new hoses and clamps, thermostat, anodes, electric fuel pump etc etc.
With some concentrated effort she should be back in the water later next week.
Hi Wander,
That looks great, how did you sand the AF off, I'm about to embark on a similar project next week. I have bought a Mirka orbital and dust extractor, wish me luck! I want to restore my underneath to a clean substrate, apply a barrier coat and lay on some hard AF with the thought of a burnish at the end. I'll post up some photos as the job progresses!
cheers Richard
Thanks, best way in the end was a belt sander with a 40 grit belt to loosen and roughen up then 40 grit orbital sander ot finish off. Used the orbital to grind out the blisters too, a bit of a waste of sanding sheets because the outside wears before the centre. Pressure's on to get her finished before Friday when the travel lift guys go on leave for Christmas New Year. Upside is my upper body strength has improved a lot.![]()
Select to expand quoteWander66 said..southace said..Wander66 said..
Sanded off the old antifoul and scraped off some degraded vinylester coating with bladed scraper, ground out the 100'ish small blisters, applied first barrier coat of Wattyl Epinamel PR250 and starting on fairing using Wattyl Seapro EFC , feel like I'll regret fairing the whole hull when I have to go back to sanding, but we'll see.
The PO had gouged out a section of the skeg to help with removing the prop shaft and left it open, which made for a weak point which had a lot of flex, so that's been filled, now there's no obvious flex, along with some minor rudder repairs.
Also had the engine cooling flushed with acid (was badly clogged) and the old rusty and cracked mixing elbow replaced with a HDI GMkit stainless version, all new hoses and clamps, thermostat, anodes, electric fuel pump etc etc.
With some concentrated effort she should be back in the water later next week.
what's the make? Dunc?
Nope Carter 33 Passage
 Nice! She certainly has a dunc 34/35 underwater profile.
For antifoul removal/fairing I would use a sander polisher with 36-80grit on the lowest speed possible the dust falls to the ground and works a treat.
Select to expand quotesouthace said..
For antifoul removal/fairing I would use a sander polisher with 36-80grit on the lowest speed possible the dust falls to the ground and works a treat.
My yard will not let you grind/sand with out any dust extraction setup!!
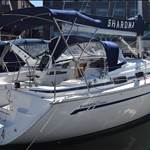
Hey Lazzz, looking like your getting / almost ready to sail away for a few months.
Any grand plans to do so?
Picked up 3 sheets of premium marine ply yesterday. Birch plywood. I've never seen it before and apparently is the new gold standard. Most likely from Russia. Still can get hoop pine but I was assured this is the stuff to use. Heavy and close grained, the veneers are just over 1mm.
Select to expand quote2bish said..
The toerail has come up good, what timber did you use?
I just bought lengths of pine from Bunnings - not ideal but cheap to see if it would work. Now I have templates for when it needs replacing with something decent!!Select to expand quoteCraig66 said..
Hey Lazzz, looking like your getting / almost ready to sail away for a few months.
Any grand plans to do so?
Yep - hopefully north for the winter next year. Having a bit of a problem convincing the Mrs though!!
Looks like I'll be going on my own.
Pick a day
Check the tide
Book the bridge
Wave good by
(spoken like the single man I am ![]() )
)
I hope to be doing same trip, if and when the right boat comes on the market.
Replaced worn keel winch wire on my sonata 7 I did it on the mooring I just had to swim under to remove the wire and re install onto keel One shackle
i had a quick sail when I returned tide was so so low I had to stop outboard and walk her to the mooring nice light little boat
the timber out board bracket needed some attention so I took it and the out board off while in such shallow water for ease I will make a better bracket at home today
Wet andwindy over here in penong at the edge of the SA Desert
Select to expand quoteWander66 said..Stockie said..Wander66 said..
Sanded off the old antifoul and scraped off some degraded vinylester coating with bladed scraper, ground out the 100'ish small blisters, applied first barrier coat of Wattyl Epinamel PR250 and starting on fairing using Wattyl Seapro EFC , feel like I'll regret fairing the whole hull when I have to go back to sanding, but we'll see.
The PO had gouged out a section of the skeg to help with removing the prop shaft and left it open, which made for a weak point which had a lot of flex, so that's been filled, now there's no obvious flex, along with some minor rudder repairs.
Also had the engine cooling flushed with acid (was badly clogged) and the old rusty and cracked mixing elbow replaced with a HDI GMkit stainless version, all new hoses and clamps, thermostat, anodes, electric fuel pump etc etc.
With some concentrated effort she should be back in the water later next week.
Hi Wander,
That looks great, how did you sand the AF off, I'm about to embark on a similar project next week. I have bought a Mirka orbital and dust extractor, wish me luck! I want to restore my underneath to a clean substrate, apply a barrier coat and lay on some hard AF with the thought of a burnish at the end. I'll post up some photos as the job progresses!
cheers Richard
Thanks, best way in the end was a belt sander with a 40 grit belt to loosen and roughen up then 40 grit orbital sander ot finish off. Used the orbital to grind out the blisters too, a bit of a waste of sanding sheets because the outside wears before the centre. Pressure's on to get her finished before Friday when the travel lift guys go on leave for Christmas New Year. Upside is my upper body strength has improved a lot.![]()
I'm half way into my sanding. For some reason last years professionally applied primer and AF after a sand is flaking off, not happy! The sanding kit is good, dust extraction is amazing, but after a day and a half I'm not making the headway I had hoped, and the sanding disks are clogging. A fellow boat owner in the yard handed me a Bacho scrapper. Hard yakka, but that planes off last years failing paint and then minimal sanding to fair her up. Another big day planned again tomorrow.