After I pulled it out of the bag and undid all the masking tape, I was a bit disappointed.
The well, that I had worried about, had come out surprisingly well. 
The thin strip in the join is because I started with the tail piece, wrong move, the carbon there covered my positional marks, so I placed it a tad too far back.
The dark areas in the yellow core cell are the carbon underneath. A large piece coming from the tail, and a smaller piece across the well.
One of the advantages of corecell is it's not completely opaque, sometimes this is handy.
But the area I was confident of, the rails in the middle of the board hadn't stuck, where there was only fiberglass underneath, where there was carbon it had stuck ok.

So I've had to mix up some runny bog, poor into the rail gaps and tape up tightly and thoroughly.
This time I've used normal hardener!
When I get this load of tape off tomorrow it'll be yet more bog into the dart gaps, and possibly a bit more work on Ratz's board
Sorry Rob, all that took much longer than I thought, had to turn the light on to clean up!
So cleaned up excess resin, routed out 2x4oz thickness around the rails, so the deck glass can overlap on to the bottom without needing to be faired out with bog.
Stuck the last couple of loose bits down, and bogged up all the gaps and dents.
I'm back to feeling real good about the board now, Rocker didn't suffer too much from vacuuming, it's possibly gained a mm at the tail and 5mm at the nose. I'll clean the bottom up tomorrow and check the V and rocker.
Not a huge amount of progress, other things keep getting in the way, like the first surf for this year yesterday arvo.
But everything is now ready for glassing the bottom.
Here's the first layer of 4oz marked and cut out.

The diagonal lines follow the weave of the cloth, the square lines will kelp to locate the cloth on the board when I roll it on to the board wetout.
I marked the next layer in red, so I can tell which layer needs moving.

Here I've just placed it on the board after marking out the center and weave lines while still on the table. next I'll straighten out thos bent weave lines and mark the location lines in red as well.
I also cut the peel ply and absorber material. (Dot has got her eye on this as it looks like her quilting wadding and was much cheaper than the quilt shops sell it).
I'm thinking of giving the surflex resin a go but the info says it's got a working time of 15 to 30mins at a temp range of 10c to 35c
Tomorrow morning is forecast to be 20c to 25c, but Tuesday is 15c to 20c.
So do I wait till Tuesday and use the fast resin? I'll be battling to get the board in the bag in 30min, but I guess I don't have to as long as both layers of cloth are on the board in that time. The resin can be like treacle and still get squashed by the bag.
I may not take the chance, and go with the slow stuff again tomorrow instead, it should go off quicker in 25deg.
First surf of the year yesterday? My condolences.
Wasn't it XL in WA yesterday? Maybe you only surf when it's over 10' !
I'm just teasing. This project looks awesome. Couple of very worthwhile details like routing out for the overlap thickness, I've often thought of but never got around to doing. Next time.![]()
Select to expand quotesaltyheaven said..
First surf of the year yesterday? My condolences.
Wasn't it XL in WA yesterday? Maybe you only surf when it's over 10' !
I'm just teasing. This project looks awesome. Couple of very worthwhile details like routing out for the overlap thickness, I've often thought of but never got around to doing. Next time.![]()
Avalon needs a big swell, especially if it's from the south, so the biggest set waves were around half mast.
Being an old fart I no longer have the energy to sail and surf on the same day.
Yesterday was the first time this year, there were good conditions, not too crowded and no chance of a sail.
I've been tossing up about using the router, because of the variation of the rail, you can't use a guide, so it's free hand. And it's very easy to let the outer side of the router drop, and the cutter goes too deep. I think it may be better to use a piece of sandpaper on a stick.
Ah, you're opposite to me, I'll only windsurf if there's no chance of a surf... ![]()
Yeah, regarding the router, that potential to tip has been my concern. I had thought just a single router pass at the overlap edge to set the depth and then by hand towards the rail from there might go ok...
First job was to lay the first layer of cloth out on the plastic and straighten the weave lines.
Here's how it looked when I rolled it out. Didn't take that long to get all these lines straight.
But then almost a complete disaster, I took the 3rd option on resin, with what I thought would give me an hour's working time. Guess I've only used this resin on smaller jobs before.
I successfully got the first layer of cloth on nice and straight, but had trouble smoothing it out. I wouldn't stick to the PVC for some reason. I was just dragging it around from place to place. Eventually I hit on the idea of pulling it around the rails first, this helped stabilise it, and I could smooth it out. But by that time 30mins had gone by and the remaining resin in the tub was getting hot, and the resin left on the plastic on the table was getting sticky. So when I spread the 2nd layer out it didn't want to smooth out. The tape round the outside also seemed to have shrunk and the cloth was a bunched up mess. So when I finally got it on the board it was all over the place, and sticking to the 1st layer. I thought a couple of times of throwing the lot on the floor and starting again with the slow resin. But I did seem to be making progress slowly so I kept at it, and eventually the bottom looked reasonably smooth. My weave and location lines were very wobbly and bent, and then I noticed the weave lines were in the same direction!
Dot said this morning I'm not good under pressure.
Seems she's right, in the stress I'd forgotten all about making sure the two cloths were at opposite angles.
Hope this doesn't make the board go in circles?
So with the distorted weaves I knew the cloth wasn't going to conform very well around the rails.
And it didn't.
So I expect there'll be more bogging than should be necessary, not sure about strength, I guess time will tell.
If you have one leg stronger than the other the same weave lines could be asymmetrically perfect , or not ![]()
You seemed to handle a difficult situation well. Worked the problem as best you could and got a satisfactory result. Not perfect but better than most. Good under pressure in my eyes.![]()
Thanks Dave.
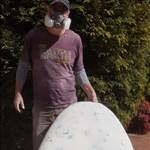
It's out of the bag. doesn't look pretty!!! But it's not as bad as I thought it would be, only needs the lumps on the rails sanding smooth and it will be ready for the top glass. I'll definitely use the slow resin this time, as I have the well to organise and carbon for the footpads.
Tomorrow is looking promising for a sail, and all the stuff has arrived to make a GPS, so I may be a tad distracted in the next few days.
Great thread Mike I can relate to the issues you have. Like checking the daily temp and time or the day to start mixing resin for glassing. Also picked up a couple of good tips like using glass as insulation so eps doesn't melt from heatgun and taping the edge of the glass when rolling on and off the tube so the thresds dont catch, thanks.
Did the glass slip on the pvc as it is a new pvc with smaller bubbles? I've nver heard of Gurit before, what size sheets does it come in, can you still get corecell ?
Did the damaged board stringer have any glass around it or was it just pvc and resin?
Select to expand quotedecrepit said..
Thanks Dave.
It's out of the bag. doesn't look pretty!!! But it's not as bad as I thought it would be, only needs the lumps on the rails sanding smooth and it will be ready for the top glass. I'll definitely use the slow resin this time, as I have the well to organise and carbon for the footpads.
Tomorrow is looking promising for a sail, and all the stuff has arrived to make a GPS, so I may be a tad distracted in the next few days.
Curious why you lay-up this way(wet out glass on flat table) instead of Old school - dry cloth on board? I've seen a few others do it your way with good success but I've always done it the other way...
Select to expand quotegorgesailor said..
Curious why you lay-up this way(wet out glass on flat table) instead of Old school - dry cloth on board? I've seen a few others do it your way with good success but I've always done it the other way...
This way is more time consuming, but results in better fiber to resin ratio. The Pvc soaks up a fair bit of resin if you layup the cloth on top of it.
Before I went to the bench method I used 1 layer of 6oz over most of the board. Now I use 2 layers of 4oz and it's no heavier, in fact I think it's lighter.
But it needs to be vacuumed on to squash the wet glass onto the foam and get as much area as possible in contact.
Actually with the smaller celled Gurit PVC, the gain may not be quite as much. I may do some tests later and find out.
With better knowledge , technique and materials I think layup could work out OK.
I believe at the cost of 200 gm of resin at the first stage of connecting the first layer of glass ( carbon or whatever ) over foam is a big factor. It seems most , ( actually pretty much all ) fails occur delaming from the core. I know closed cell foam absorbes a lot between the cells. Laying up would have to give better grip ( keying ) to the blank than wetting on the bench and vacuuming , which is more like sticking to the blank.
Im just a chopper , but I would think layup first layer and bag the rest ?
I wonder if using more at the start could save using less at the end ???
Mabee I need to get out the tools and shut up ![]()
S..t , now I need a vacuum pump.
Select to expand quoteImax1 said..
With better knowledge , technique and materials I think layup could work out OK.
I believe at the cost of 200 gm of resin at the first stage of connecting the first layer of glass ( carbon or whatever ) over foam is a big factor. It seems most , ( actually pretty much all ) fails occur delaming from the core. I know closed cell foam absorbes a lot between the cells. Laying up would have to give better grip ( keying ) to the blank than wetting on the bench and vacuuming , which is more like sticking to the blank.
Im just a chopper , but I would think layup first layer and bag the rest ?
I wonder if using more at the start could save using less at the end ???
Mabee I need to get out the tools and shut up ![]()
S..t , now I need a vacuum pump.
Do it.... you wont regret it.
I wet out on plastic as its easier and wastes less resin. A wet layup on a board say the deck the resin is always trying to run off the board, wetting out the rail glass it tricky as it wants to run onto the floor therefore you have to mix more to allow for the wastage. The vacuumed glass dries flatter so less filler is used to cover the weave pattern, a dried wet layup with no bagging leaves raised area at every cross over in the weave. On both wet out on board and wet out on plastic, before I put the glass dry or wet on the board I always mix up a very thick paste of 100ml resin and qcell and squeegee this onto the board to fill all empty bubbles in the pvc, yes it adds 200gm both sides, but gives a super strong bond and I can pull out excess resin from thr glass fibre, right or wrong its just how I do it and it works for me.
Just a question that may be off topic but it relates to board building.
Does anyone have any info regarding building a kind strength/stiffness/stringer using more glass/carbon on rail wraparounds? That way the load is spread over a wider area and offers strength over all angles due to the curved nature. It also transfers stresses over a much wider area and at different angles much like the monocoque fuselage structure of a plane...... or not?
Disadvantages?
Weight
Too stiff or not stiff enough
Has anyone here tried this or wondered whether it would make a board a lot more durable?
Select to expand quoteR1DER said..
I wet out on plastic as its easier and wastes less resin. A wet layup on a board say the deck the resin is always trying to run off the board, wetting out the rail glass it tricky as it wants to run onto the floor therefore you have to mix more to allow for the wastage. The vacuumed glass dries flatter so less filler is used to cover the weave pattern, a dried wet layup with no bagging leaves raised area at every cross over in the weave. On both wet out on board and wet out on plastic, before I put the glass dry or wet on the board I always mix up a very thick paste of 100ml resin and qcell and squeegee this onto the board to fill all empty bubbles in the pvc, yes it adds 200gm both sides, but gives a super strong bond and I can pull out excess resin from thr glass fibre, right or wrong its just how I do it and it works for me.
Sounds great Rider. I also use the flat layout and agree 100%. I must try the q cell. 200 grams is worth the stronger bond.
I bought a damaged 2012'ish Isonic for dirt cheap and was repairing it. I was amazed how light it is but soon found out that the thing has virtually no reinforcements anywhere. There is nothing like doing your own board with all its extra bits of care imo.
Select to expand quoteImax1 said..
With better knowledge , technique and materials I think layup could work out OK.
I believe at the cost of 200 gm of resin at the first stage of connecting the first layer of glass ( carbon or whatever ) over foam is a big factor. It seems most , ( actually pretty much all ) fails occur delaming from the core. I know closed cell foam absorbes a lot between the cells. Laying up would have to give better grip ( keying ) to the blank than wetting on the bench and vacuuming , which is more like sticking to the blank.
Im just a chopper , but I would think layup first layer and bag the rest ?
I wonder if using more at the start could save using less at the end ???
Mabee I need to get out the tools and shut up ![]()
S..t , now I need a vacuum pump.
I think your saying most delams occur in the eps just under the pvc? and a wet layup would allow the resin to penetrate deeper into the eps therefore reducing delam?
Yes delams occur in the eps layer but most ive seen its the foam bubbles separate from each other so extra resin might seep in and bond the first two layers/rows of bubbles then the delam would occur between rows 2 and 3. If you added even more resin to seep down to layers say 5 the dealm would occur deeper between layers 5 and 6.
You would be better of keeping the vent plug open all the time except when sailing and making a stiffer sandwich to reduce delams.
Select to expand quoteR1DER said..Imax1 said..
With better knowledge , technique and materials I think layup could work out OK.
I believe at the cost of 200 gm of resin at the first stage of connecting the first layer of glass ( carbon or whatever ) over foam is a big factor. It seems most , ( actually pretty much all ) fails occur delaming from the core. I know closed cell foam absorbes a lot between the cells. Laying up would have to give better grip ( keying ) to the blank than wetting on the bench and vacuuming , which is more like sticking to the blank.
Im just a chopper , but I would think layup first layer and bag the rest ?
I wonder if using more at the start could save using less at the end ???
Mabee I need to get out the tools and shut up ![]()
S..t , now I need a vacuum pump.
I think your saying most delams occur in the eps just under the pvc? and a wet layup would allow the resin to penetrate deeper into the eps therefore reducing delam?
Yes delams occur in the eps layer but most ive seen its the foam bubbles separate from each other so extra resin might seep in and bond the first two layers/rows of bubbles then the delam would occur between rows 2 and 3. If you added even more resin to seep down to layers say 5 the dealm would occur deeper between layers 5 and 6.
You would be better of keeping the vent plug open all the time except when sailing and making a stiffer sandwich to reduce delams.
Yes.... the eps bubbles stick to the glass/pvc foam but then separate from each other..... you cant win.
Select to expand quoteDar said..
Just a question that may be off topic but it relates to board building.
Does anyone have any info regarding building a kind strength/stiffness/stringer using more glass/carbon on rail wraparounds? That way the load is spread over a wider area and offers strength over all angles due to the curved nature. It also transfers stresses over a much wider area and at different angles much like the monocoque fuselage structure of a plane...... or not?
Disadvantages?
Weight
Too stiff or not stiff enough
Has anyone here tried this or wondered whether it would make a board a lot more durable?
I put 80mm wide carbon 30cm from nose to back strap over the eps on the rails and again on the outside on the rails, Nil issues so far. Minimal wt gain, board feels fine after 300 hours use
Hi Rider
What weight carbon, 200gsm?
Slalom or wave board?
Have you found it to be very stiff?
Select to expand quoteR1DER said..
>>>>
I think your saying most delams occur in the eps just under the pvc? and a wet layup would allow the resin to penetrate deeper into the eps therefore reducing delam?
Yes delams occur in the eps layer but most ive seen its the foam bubbles separate from each other so extra resin might seep in and bond the first two layers/rows of bubbles then the delam would occur between rows 2 and 3. If you added even more resin to seep down to layers say 5 the dealm would occur deeper between layers 5 and 6.
You would be better of keeping the vent plug open all the time except when sailing and making a stiffer sandwich to reduce delams.
Yep, If you look back to the beginning of this thread. There's a pic of Ratz's delam, where the resin has soaked into the eps about a centimeter, and that's where it delamned.
Select to expand quotedecrepit said..gorgesailor said..
Curious why you lay-up this way(wet out glass on flat table) instead of Old school - dry cloth on board? I've seen a few others do it your way with good success but I've always done it the other way...
This way is more time consuming, but results in better fiber to resin ratio. The Pvc soaks up a fair bit of resin if you layup the cloth on top of it.
Before I went to the bench method I used 1 layer of 6oz over most of the board. Now I use 2 layers of 4oz and it's no heavier, in fact I think it's lighter.
But it needs to be vacuumed on to squash the wet glass onto the foam and get as much area as possible in contact.
Actually with the smaller celled Gurit PVC, the gain may not be quite as much. I may do some tests later and find out.
Hi Decrepit,
Thanks for clarifying, makes senses. I always used a combination of yours & R1ders technique. Pre-seal the blank & the or the hd foam with Q-cell/epoxy then drape the dry cloth & laminate wet on the board. If you move quick & use a wide stiff blade as a squeegie, you will have very little waste & a good ratio. I used a wide(12") drywall taping knife with the corners rounded. Then when you bag it ratios even better & you don't get all that resin in the sandwich.
More advice please.
If its not the glass unsticking from the foam but rather the foam ripping apart , ( although i have seen both and a combination of the two ) , does a heavier foam rip less , ( 17 kg as apposed to 13kg ) ? I wonder if the smaller foam spheres hold the foam together better ?
and...
Surely a resin infused foam from a layup would have to be stronger. Wouldn't it create a kind of resin honey comb effect a couple foam spheres down creating a harder and stronger outer foam layer ? Like a pre sandwich layer ?
I've often seen the combo. I put it down to an initial failure of the foam, creating an air bubble when bung is opened. Then said bubble forcing adjacent, delam as going over chop "pumps" the bubble. That's why I get annoyed with people pressing on a delam, especially if the bung is still done up.
I think you're right about heavier foam being stronger, but I've done no tests to find out. I use 24kg/m3 on my wave boards for that reason.
In theory you should also be right about resin in the eps, but in practice it doesn't seem to help. I think the spheres themselves flex, whether there's resin around them or not, so effectively, the resin doesn't help stiffen the sandwich.