Looking to get some creative design juices flowing. I am thinking about doing a wing build for windfoiling, I have built a large wing out of pine a few years ago for my old neil pryde alu foil. Never ended up putting the finishing touches on then upgraded foil system to moses. Wish I had kept the wing, but look foward to trying to pump out some more designs on my spare time.
Moses/slingshot actually has a fairly simple wing mount design that would be easy to replicate by building up a ridge of epoxy before glassing the wing. Finding the right AOA will be more difficult I think.
I'm thinking about using some pine wood again, maybe not the best option but it's what I have readily accessible at home and would require less fiberglass then foam. Flat bottom wings are much easier to shape but l would like to try to get a curve shape in the wing this time.
I'm only windfoiling, won't go bigger then 90cm/1500cm2 in span/SA to keep less stress on my m6 bolts. Some wings I'd like to replicate are moses 799, 899, slingshot pfi 730 or infinity 76.
Anyone have any luck building wings for a moses fuse?


Found one of my old plywood wings in the garage today. Made over 3 years ago before high aspect was a thing. It's 940mm x 130mm. Very high aspect. 30mm less chord then the moses 940!
Debating weather to glue another piece of ply on to make it thicker and chop the tips to either 799 or 899.
Or
Leave it thin(maybe too thin?), shape the bottom with a slight arc like the moses 940?


The first design I want to make is the pfi 730. It has that gull wing shape. Would be very difficult to just sand a peice of pine into that shape with a electric sander. My idea is to start with a thick peice of pine, make measurements along the end of the wood(draw out the front wing profile). Make cuts in increments of around 1/4" using a circular saw. Make each individual cut along the entire wing chord changing the blade depth of each cut as I make my way to the wing tips. Then knock out with a hammer claw or chisel the wood channels I cut. This should give the wing a rough profile along the span. I could then sand and finish shaping the wing.
Select to expand quoteCAN17 said..
The first design I want to make is the pfi 730. It has that gull wing shape. Would be very difficult to just sand a peice of pine into that shape with a electric sander. My idea is to start with a thick peice of pine, make measurements along the end of the wood(draw out the front wing profile). Make cuts in increments of around 1/4" using a circular saw. Make each individual cut along the entire wing chord changing the blade depth of each cut as I make my way to the wing tips. Then knock out with a hammer claw or chisel the wood channels I cut. This should give the wing a rough profile along the span. I could then sand and finish shaping the wing.
I think you're making it harder than you should. I don't know how thick the pine is you can lay your hands on, but I've been thinking to make a gull shaped wing with a PU core. I'd have done it like this: two pieces of 1cm thick PU foam glued to each other with a small object under the middle section and some clamps 5cm from the wing tips. Some basic gorilla/ pu glue would be enough to make those sheets stick an give you the arch you are looking for.
In terms of construction you've got to ask yourself the question what you are looking for. A wood core, fibreglass wrapped wing will make a very suitable prototype or freeride wing, but it'll be fragile when pushing for speed or jumping. I'd encourage you to make as many cheap and easy prototypes as you can imagine.
to get a high performance wing, you'd preferably have a lighter core and a suited carbon layup (triax or biax + uni, stronger in the centre and lighter on the tips). The core honestly doesn't matter that much, it can help but it are the fibres that have to take most of the forces.
another note, the thicker the wing, the stronger it is. If the layers of fibre are further apart from each other, it significantly improves strength. I'll spare you the details why that is, but my point is that it might be better not to start with crazy thin wings but rather progress to that.
a lot of brands use fibreglass for 90% and then a small layer of carbon so it can be sold at a higher price, so don't let the construction stress hold you back. However, I'd heavily recommend to use biax or rotate a twill/plain in such a way that it's at a 45 degree angle.
i'm switching from f-one to gong foils now so unfortunately, those fuse systems make it very hard to burst out prototypes. I'm currently focused on stabs so looking forward to the stuff you come up with!
don't hesitate to shoot a message if you want to further elaborate!
LP foils used to have wood cores on the wings, do not know if that has changed, but according to the guys at Sailworks they could feel those wood core wings flutter when hitting max speeds.
Select to expand quoteSandman1221 said..
LP foils used to have wood cores on the wings, do not know if that has changed, but according to the guys at Sailworks they could feel those wood core wings flutter when hitting max speeds.
I think it's more likely because the fibres were used incorrectly (to few, wrong direction, wrong fabric,.), the core really is of little influence
Fun project, hard to match what is made in production, but riding DIY can bring some personal satisfaction, I have been there with many sports and enjoyed using my own work, let us know how you go
Select to expand quoteNicoDC said..CAN17 said..
The first design I want to make is the pfi 730. It has that gull wing shape. Would be very difficult to just sand a peice of pine into that shape with a electric sander. My idea is to start with a thick peice of pine, make measurements along the end of the wood(draw out the front wing profile). Make cuts in increments of around 1/4" using a circular saw. Make each individual cut along the entire wing chord changing the blade depth of each cut as I make my way to the wing tips. Then knock out with a hammer claw or chisel the wood channels I cut. This should give the wing a rough profile along the span. I could then sand and finish shaping the wing.
I think you're making it harder than you should. I don't know how thick the pine is you can lay your hands on, but I've been thinking to make a gull shaped wing with a PU core. I'd have done it like this: two pieces of 1cm thick PU foam glued to each other with a small object under the middle section and some clamps 5cm from the wing tips. Some basic gorilla/ pu glue would be enough to make those sheets stick an give you the arch you are looking for.
In terms of construction you've got to ask yourself the question what you are looking for. A wood core, fibreglass wrapped wing will make a very suitable prototype or freeride wing, but it'll be fragile when pushing for speed or jumping. I'd encourage you to make as many cheap and easy prototypes as you can imagine.
to get a high performance wing, you'd preferably have a lighter core and a suited carbon layup (triax or biax + uni, stronger in the centre and lighter on the tips). The core honestly doesn't matter that much, it can help but it are the fibres that have to take most of the forces.
another note, the thicker the wing, the stronger it is. If the layers of fibre are further apart from each other, it significantly improves strength. I'll spare you the details why that is, but my point is that it might be better not to start with crazy thin wings but rather progress to that.
a lot of brands use fibreglass for 90% and then a small layer of carbon so it can be sold at a higher price, so don't let the construction stress hold you back. However, I'd heavily recommend to use biax or rotate a twill/plain in such a way that it's at a 45 degree angle.
i'm switching from f-one to gong foils now so unfortunately, those fuse systems make it very hard to burst out prototypes. I'm currently focused on stabs so looking forward to the stuff you come up with!
don't hesitate to shoot a message if you want to further elaborate!
Haven't really thought about the layup yet. But might need some info on that eventually. I plan on making a few wood prototypes this winter. I could be wrong, I thought wood core would be stronger then foam, obviously the glass gives it it's strength but for someone like me who doesn't know anything about fiberglass layup, wood might be more forgiving if it's a bad glass job. Not sure why wood would flutter at speed. The first wing I made out of pine was very strong not even any deflection when I stood on it suspended at the tips, keeping in mind tips are not thin and it's a boxy shape.
I drew out a few mustaches today. I wasn't sure how thick the pfi 730 is at its thickest point so just did what felt right. If someone with this wing could measure that would be sweet.
I think #2 is most like the 730, #5 has a bigger flat mid section like the 799 and #6 is in between. Tips are kinda thin. Would like to add winglets but might be out of reach for my skill level for now, but think it's worth a try.
Pfi 730

 moses 799
^^^

Building own wings is fun, as it allows to compensate for some of my lack of skills on the water. Jibing became a lot easier with a bigger low-aspect 3D-printed wing than with the original 971 cm2 Horue XLW.
Span 100 cm
Root chord 20 cm
Area 1700 cm2
Section HQW2.5-11 (2.5 % camber, 11 % thickness)
The wing was printed in 6 sections of about 17 cm length. The sections have alignment holes of 5 mm diameter to take up wooden dowels to join them. The outline is elliptical, without back sweep to get a straight spar. The spar is made from carbon rovings which were placed in slots on top and bottom of the thickest part of the wing, at 34 % of chord length. The slots are parallel, 9 mm wide, and 9 mm deep at the root. As the wing gets thinner towards the tips, the slots get less deep, and the number of rovings is reduced accordingly. Core material is PLA, the part between the spar slots is printed solid, the rest with 30 % cubic infill. The wing was laminated with one layer of diagonally oriented (+/- 45?) 160 g/m2 carbon twill and one layer of 80 g/m2 glass and a layer of peel ply. A vacuum bag was used for curing. The main role of the glass layer is to protect the carbon layer in the sanding step. (Sorry for the absence of pictures, but I'm new here.)
Select to expand quoteAra said..
Building own wings is fun, as it allows to compensate for some of my lack of skills on the water. Jibing became a lot easier with a bigger low-aspect 3D-printed wing than with the original 971 cm2 Horue XLW.
Span 100 cm
Root chord 20 cm
Area 1700 cm2
Section HQW2.5-11 (2.5 % camber, 11 % thickness)
The wing was printed in 6 sections of about 17 cm length. The sections have alignment holes of 5 mm diameter to take up wooden dowels to join them. The outline is elliptical, without back sweep to get a straight spar. The spar is made from carbon rovings which were placed in slots on top and bottom of the thickest part of the wing, at 34 % of chord length. The slots are parallel, 9 mm wide, and 9 mm deep at the root. As the wing gets thinner towards the tips, the slots get less deep, and the number of rovings is reduced accordingly. Core material is PLA, the part between the spar slots is printed solid, the rest with 30 % cubic infill. The wing was laminated with one layer of diagonally oriented (+/- 45?) 160 g/m2 carbon twill and one layer of 80 g/m2 glass and a layer of peel ply. A vacuum bag was used for curing. The main role of the glass layer is to protect the carbon layer in the sanding step. (Sorry for the absence of pictures, but I'm new here.)
Just when they finally come out with a proper bigger wing (XLW 1611 LA) ... ![]() (I found the original XXLW impossible to jibe)
(I found the original XXLW impossible to jibe)
Clever method. A lot more flexibility in shape vs cnc'ing G10 Kane DeWilde does that to prototype wings.
41:20 and onwards - whole interview is cool if you have the time
Select to expand quoteAra said..
Building own wings is fun, as it allows to compensate for some of my lack of skills on the water. Jibing became a lot easier with a bigger low-aspect 3D-printed wing than with the original 971 cm2 Horue XLW.
Span 100 cm
Root chord 20 cm
Area 1700 cm2
Section HQW2.5-11 (2.5 % camber, 11 % thickness)
The wing was printed in 6 sections of about 17 cm length. The sections have alignment holes of 5 mm diameter to take up wooden dowels to join them. The outline is elliptical, without back sweep to get a straight spar. The spar is made from carbon rovings which were placed in slots on top and bottom of the thickest part of the wing, at 34 % of chord length. The slots are parallel, 9 mm wide, and 9 mm deep at the root. As the wing gets thinner towards the tips, the slots get less deep, and the number of rovings is reduced accordingly. Core material is PLA, the part between the spar slots is printed solid, the rest with 30 % cubic infill. The wing was laminated with one layer of diagonally oriented (+/- 45?) 160 g/m2 carbon twill and one layer of 80 g/m2 glass and a layer of peel ply. A vacuum bag was used for curing. The main role of the glass layer is to protect the carbon layer in the sanding step. (Sorry for the absence of pictures, but I'm new here.)
Awesome sounds like a cool wing. Definitely post some pics when you can, I dont understand why that is for new members.
I wish I had access to a 3D printer I'm stuck doing it the old fashion way.
I am moving on to some other designs. Higher aspect thinner wings about 15mm thick. Inspired by the moses W800 and w740. My goal is to make a wing that has great glide efficiency and speed that still carves great and is fun in waves. The profiles have some deheadral curve.
I got side tracked today making a huge 52cm thin
stabilizer. Hopefully start on the front wings tomorrow.
 W720 with my W800 cutout on top and a lower aspect 720.
Select to expand quotePaducah said..Ara said..
Building own wings is fun, as it allows to compensate for some of my lack of skills on the water. Jibing became a lot easier with a bigger low-aspect 3D-printed wing than with the original 971 cm2 Horue XLW.
Span 100 cm
Root chord 20 cm
Area 1700 cm2
Section HQW2.5-11 (2.5 % camber, 11 % thickness)
The wing was printed in 6 sections of about 17 cm length. The sections have alignment holes of 5 mm diameter to take up wooden dowels to join them. The outline is elliptical, without back sweep to get a straight spar. The spar is made from carbon rovings which were placed in slots on top and bottom of the thickest part of the wing, at 34 % of chord length. The slots are parallel, 9 mm wide, and 9 mm deep at the root. As the wing gets thinner towards the tips, the slots get less deep, and the number of rovings is reduced accordingly. Core material is PLA, the part between the spar slots is printed solid, the rest with 30 % cubic infill. The wing was laminated with one layer of diagonally oriented (+/- 45?) 160 g/m2 carbon twill and one layer of 80 g/m2 glass and a layer of peel ply. A vacuum bag was used for curing. The main role of the glass layer is to protect the carbon layer in the sanding step. (Sorry for the absence of pictures, but I'm new here.)
Just when they finally come out with a proper bigger wing (XLW 1611 LA) ... ![]() (I found the original XXLW impossible to jibe)
(I found the original XXLW impossible to jibe)
Clever method. A lot more flexibility in shape vs cnc'ing G10 Kane DeWilde does that to prototype wings.
41:20 and onwards - whole interview is cool if you have the time
Thanks for sharing.
30kts is fast if I got to 25kts i would be happy. Over 20kts on a homemade wing would be impressive.
Maybe look at the latest GoFoil wings with stepped tips. Efficient, carvey and mid aspect (6-7:1) but thin.
Select to expand quoteGrantmac said..
Maybe look at the latest GoFoil wings with stepped tips. Efficient, carvey and mid aspect (6-7:1) but thin.
Have see those. Very interesting concept having fences to prevent ventilation. I have a feeling we will see more technology put into our wings like airplane wings.
www.seabreeze.com.au/forums/Stand-Up-Paddle/Foiling/DIY-Wing-Fences?page=1#15
I think the steps would be dead easy to sand into a plywood wing. Easier than measuring a specific amount of washout and trying to blend it evenly.
Select to expand quoteGrantmac said..
Maybe look at the latest GoFoil wings with stepped tips. Efficient, carvey and mid aspect (6-7:1) but thin.
Interesting rabbit hole. Look up "leading edge cuffs". Directed at stall instead of ventilation but similar in effect to washout ie promotes retention of lift on the outside of the wing.
Select to expand quotePaducah said..Grantmac said..
Maybe look at the latest GoFoil wings with stepped tips. Efficient, carvey and mid aspect (6-7:1) but thin.
Interesting rabbit hole. Look up "leading edge cuffs". Directed at stall instead of ventilation but similar in effect to washout ie promotes retention of lift on the outside of the wing.
Indeed, I'm rather familiar with high life devices used in general aviation and was always sure I'd start seeing them in foil design. Steps aren't really wing fences or cuffs but kind of a combination of the two plus washout. Not the most efficient but control is a major factor in the real world.
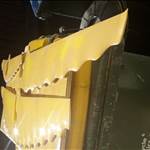
The stabilizer is more or less shaped to finish. Specs: 8mm thick x 86mm x 520mm.
This wing is much thinner then my moses 483 stab. No idea on SA but maybe someone knows how to figure it out. It's big, hopefully it will be a light wind weapon. Being that it's so thin, I might need to build up some epoxy around the mounting holes in order to get enough strength around the holes before counter sinking it?
Any suggestions on this and finishing, like how many layers of fiberglass or carbon should I use?
The wing isn't as flimsy as i thought it would be.
The front wing didn't go as well unfortunately![]()
The 720 had a tip break off at the start from a knot(binned it). And my w800 is 70% shaped but is in need some epoxy injections into some of the cracks in the wood. I learned knots are not your friend. I was using a peice of BC red wood it must have been old as it was super dry and brittle. Was actually happy with how its shaping out, too bad about the cracks and knots though![]()
Any suggestions on what wood to use? I will try to buy something that is knot free next time, balsa?
Might consider using ply? Kinda enjoyed the old hammer and chisel approach making some skill saw cuts along the way, I had the wing profile taped to the front as a guide. Once I got about 1/4"-1/8" to the profile i got out the hand held belt sander.


I like the idea of steps kinda looks more like a twist from the side veiw. Maybe that's why the moses 799 has great control on tip breaches because of the washout(twist) in the tips giving them a lower angle of incidance then the root chord. I wounder what would happen if your made the tips a more positive angle of incidance compared to the root chord, would this give more lift or create a stall easier? If you look at f18 fighter jets it looks like they have a step that works in a similar way to gofoil. Giving the tips a lower degree of incidance(ie root chord has more positive angle of attack then the tips). Which is essentially just washout or is it better then washout having the step(fence) to spill off water from traveling down the entire wing chord when you breach the tip?


 I can just imagine how much seaweed would get trapped where the front edge separates on that wing, not good
![]()
That surface on the F18 is movable.
In essence yes the GoFoil and Moses both have washout but the hard transition on the GoFoil offers more control because it's also a fence of sorts.
You definitely want less angle of incidence at the tips and almost every foil has this implemented in some way. Greater amounts lead to less performance however so finding an airfoil section which doesn't increase drag or shift center of lift dramatically with change of angle of attack is key.
Select to expand quoteCAN17 said..
The stabilizer is more or less shaped to finish. Specs: 8mm thick x 86mm x 520mm.
This wing is much thinner then my moses 483 stab. No idea on SA but maybe someone knows how to figure it out. It's big, hopefully it will be a light wind weapon. Being that it's so thin, I might need to build up some epoxy around the mounting holes in order to get enough strength around the holes before counter sinking it?
Any suggestions on this and finishing, like how many layers of fiberglass or carbon should I use?
The wing isn't as flimsy as i thought it would be.
The front wing didn't go as well unfortunately![]()
The 720 had a tip break off at the start from a knot(binned it). And my w800 is 70% shaped but is in need some epoxy injections into some of the cracks in the wood. I learned knots are not your friend. I was using a peice of BC red wood it must have been old as it was super dry and brittle. Was actually happy with how its shaping out, too bad about the cracks and knots though![]()
Any suggestions on what wood to use? I will try to buy something that is knot free next time, balsa?
Might consider using ply? Kinda enjoyed the old hammer and chisel approach making some skill saw cuts along the way, I had the wing profile taped to the front as a guide. Once I got about 1/4"-1/8" to the profile i got out the hand held belt sander.
Nice job!
A stab with such a wide span will be fantastic to keep you in the air when the wind drops, but will be hard to turn/gybe. I'd love to have such a stab in my quiver.
I'd certainly fill the mounting holes prior to lamination. This area will tak a lot of the forces so it's worth the effort.
I've so far never worked with foils (only boards), but if I were to, I'd used 300-400gr biaxial glass. One patch over the entire wing, one over 2/3rd and one over the middle 1/3rd. Have you worked withe fibreglass before? If not, maybe best to use 200gr twill and cut the glass at an angle yourself. Biax is not as fragile to work with, which is nice, but it is also much harder to wet out as the resin doesn't go through the fabric as easily. You'll need the fibres to go at a +-45 degree angle as it stops the flex, but more importantly it can take the torsional powers. A piece of peelply would be good to use as to make it all wrap tightly and leave a nice surface.
don't make it to difficult. I'm sure it'll work and if it's to twitchy, slap some more glass on it.
ply is more than suited. Balsa is nice to sand as it is a very soft wood, but soaks epoxy
Select to expand quotePaducah said..
Alex Aguera talks about the GoFoil step starting around 03:00
The step throws people off the scent. I think Alex cut his mould ends off, welded them on at new angles, cleaned up the join and now he has his 2021/2022 range and with higher performance. Very smart thinking but slightly misleading marketing![]() .
.
Smooth washout makes breaches recoverable. I've been doing it in my designs from February of this year onwards. I'm currently 115kg. My go to wing now is 1145 sq cm area, just replaced my 18 month older 1800sqcm foil I made to learn on with a 1550 sqcm 1160span foil. Both of them very resilient to breaches. On the big one, I can breach it flat with no drama what so ever. I can turn with the tip right out of the water and only know if I'm looking at it. On the smaller one it recovers most breaches but not all. I like the designing, the riding but I don't like the business aspect, it's too tedious for me. I'd be happy to contract design for an established businesses though. Currently I'm exploring the optimizations between [wave handling and general friendly behavior] and speed. You can't really have full performance in both but you can have a foil you really *heart* and want to ride all the time. All the 2022 foils I've made this year(in carbon, from moulds) have been great but it's the behavior of my last two that progress beyond speed to become a dream in the waves that I love. Next on the build list is a 1115sqcm 1m span wing that will have scorching speed and most of the fun aspect for waves and also a smaller, slightly detuned version of my current favorite, I made it fractionally under 800sqcm to give lighter riders a taste of what I'm enjoying, or for me, more speed on the windier days. So far I'm designing them to fit Axis black fuselage which has a good, sturdy design.


Select to expand quotefluidity said..Paducah said..
Alex Aguera talks about the GoFoil step starting around 03:00
The step throws people off the scent. I think Alex cut his mould ends off, welded them on at new angles, cleaned up the join and now he has his 2021/2022 range and with higher performance. Very smart thinking but slightly misleading marketing![]() .
.
Smooth washout makes breaches recoverable. I've been doing it in my designs from February of this year onwards. I'm currently 115kg. My go to wing now is 1145 sq cm area, just replaced my 18 month older 1800sqcm foil I made to learn on with a 1550 sqcm 1160span foil. Both of them very resilient to breaches. On the big one, I can breach it flat with no drama what so ever. I can turn with the tip right out of the water and only know if I'm looking at it. On the smaller one it recovers most breaches but not all. I like the designing, the riding but I don't like the business aspect, it's too tedious for me. I'd be happy to contract design for an established businesses though. Currently I'm exploring the optimizations between [wave handling and general friendly behavior] and speed. You can't really have full performance in both but you can have a foil you really *heart* and want to ride all the time. All the 2022 foils I've made this year(in carbon, from moulds) have been great but it's the behavior of my last two that progress beyond speed to become a dream in the waves that I love. Next on the build list is a 1115sqcm 1m span wing that will have scorching speed and most of the fun aspect for waves and also a smaller, slightly detuned version of my current favorite, I made it fractionally under 800sqcm to give lighter riders a taste of what I'm enjoying, or for me, more speed on the windier days. So far I'm designing them to fit Axis black fuselage which has a good, sturdy design.
Wings look cool kinda like takuma, what is the idea behide that serrated front edge?
I'm slowly losing motivation for finishing my moses w800 copy cat. The Balz pro 799 is just so epic. Great speed and very early aggressive lift. Like those wings you can breach a tip and keep foiling. Very fun in the waves especially on a long mast 111cm
Select to expand quoteCAN17 said..fluidity said..
Wings look cool kinda like takuma, what is the idea behide that serrated front edge?
I'm slowly losing motivation for finishing my moses w800 copy cat. The Balz pro 799 is just so epic. Great speed and very early aggressive lift. Like those wings you can breach a tip and keep foiling. Very fun in the waves especially on a long mast 111cm
The serrations are known as tubercles and humpback whale flippers have them. They can separate regions of stall from causing complete full wing stall. My foil gybing is retarded, I can't do it yet. So I usually slow right down and gybe off foil. With the big 1550 sq cm foil(not in that picture), It is a fairly soft stall at a very low speed.
Most recent pics. Close to glassing just need to get a game plan for attaching the mount and glassing it sufficiently. How hard would this be to glass for a beginner?


Select to expand quoteCAN17 said..
Most recent pics. Close to glassing just need to get a game plan for attaching the mount and glassing it sufficiently. How hard would this be to glass for a beginner?
Select to expand quoteCAN17 said..
Most recent pics. Close to glassing just need to get a game plan for attaching the mount and glassing it sufficiently. How hard would this be to glass for a beginner?
Unless you wrap the composites around the leading edge and stitch them at the trailing edge, you will have issues at the front. Or you can tape them just past top or bottom, wrapped to the other side and epoxy the full coverage face. Then repeat for the other side. Or for resin infusion covering, trim a bit off the leading edge where the sides will meet and rebuild the leading edge shape with filler afterwards. Prep a jig to get the angles right before you start your composites.
I don't understand how people on this site can argue over 100's of posts over harness line lengths, when you blokes are doing awesome stuff like this. Keep at it fellas, looks epic.
Been listening to a few of the progression project podcasts, super interesting all the different ideas going into progressing the sport currently.
Select to expand quoteswoosh said..
I don't understand how people on this site can argue over 100's of posts over harness line lengths
So do i
Select to expand quoteCAN17 said..
Most recent pics. Close to glassing just need to get a game plan for attaching the mount and glassing it sufficiently. How hard would this be to glass for a beginner?
go to www.clearwaterfoils.com/ for help with glassing.
Hi I am. I used xflr5 as a cfd program, fusi?n 360 for modeling, and a 3d printer to maje the molds... Hard work but very interesting. I'm not yet prepared for a mast but it Will come.
3d printed mold in progress for a 1380 cm2 wing 900 cm span.
 200 cm2 stabilizer.