Hi all,
Almost a year ago, BEACHSTART generously gave me a Starboard Formula 159. Having wanted to start foiling, it seemed like the perfect project to get into it on a student budget. When we picked up the board, I had no clue how much work I was in for ![]() .
.


The deck had quite a few cracks and soft spots to be addressed. It had taken on some water so I cut back the rotten bits and let it dry out. The construction of these boards seems prone to this issue as there is no fibreglass over the top layer of wood. After the clear coat weathers away, there is nothing protecting it from water and oxidation.


Cue a 6 month wait. Like all projects, uni got in the way and the board sat in my garage. This turned out to be quite helpful as the foam was completely dry by the time I got back to it. Before anyone says anything, yes I know the board will always be soft, but I am only 60 kg and I wanted to finish it anyway! It will hold up for my purposes and as you will soon see, the deck has some extra glass that should help keep it together.
Eventually I got to sanding the deck grip off, this took forever. I ended up using 40 or 60 grit sanding pads on the random orbital with a cutting motion. This made most of the old grip flake off but it did take a few days. The old paint on the bottom was pretty worn as well so I knocked that down too.


Finally, it was time to start repairs. Most were quite simple, just 1 or 2 layers of surfboard cloth. The bigger areas had a bit more glass, using 200 gsm mat as a base and cloth on the top. Where I cut the deck away, I tried to follow the original layup. It went EPS (PU pour foam instead) surfboard cloth, divinycell (substituted with coremat), 2 layers of surfboard cloth and wood. I changed the top 2 layers by using glass mat and cloth instead. Getting the thickness was tricky so I ended up repeating this layup to make up the remaining height.
The nose was reinforced with extra glass to make it more resistant to mast impacts.


The fin box was actually quite a simple job, Just 4 layers of carbon + a layer of glass on the top; 2 layers of carbon and 1 layer of glass on the bottom. If I were heavier I would be inclined to beef it up more, but this should be fine for me. If it falls apart, I can always make a new one.


Eventually I started fairing. I used microballoons where needed and some leftover epoxy filler. The bottom got a coat of epoxy for waterproofing but I ended up with this weird texture. No idea what it was but after even more sanding, the bottom was ready for paint.

After 2 weeks of tedious work, I finally did the last layup. The whole deck got a layer of surfboard cloth. This was mostly to hold the wood together and stop any water ingress, but it should also toughen up the board a fair bit. Because I used peel ply, I thought I wouldn't need to fill, just sand. If I were doing this again, I would use microballoons before painting.


The rest of the project is pretty basic, I just used the Norglass 2k polyurethane system with ShipShape primer. I rolled this paint but I would probably spray it next time. I found that rolling gave quite a thick orange peel. When sanding the bottom, I was running out of paint before getting to the low spots, and it meant that it ended up being left at a 120 grit finish. I might repaint it in the future, depending on how long the board lasts, but it really doesn't matter since it shouldn't be in the water.
For the deck grip I used Norglass liquid glass and salt. It is supposed to be UV stable but it does not cure very hard. Baking it in the sun helped but I would like to experiment with a polyurethane next time. It should be a lot cheaper and less likely to yellow. It did end up being super grippy though, as evidenced by the grazes all over my feet.

The deck pads were the last step. I used 5mm EVA and it worked quite well. I don't have a router but sanding the edges gave them a very nice, professional finish. Anyone eagle-eyed might notice that one of the pads has the diamonds aligned in the wrong direction ![]() . Finally though, I was done.
. Finally though, I was done.


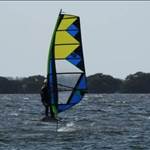
I got the chance to try it yesterday and it worked brilliantly! I got it up for a few seconds at a time and the crashes weren't too painful! Unfortunately for me, I broke a mast base just as the wind and tides turned offshore, but at least the board held up!

Thanks for reading!
Good that it didn't find its way into the landfill. Did you replace with a foil box or just reinforced? I think that I would have put EVA on the complete rear half of board. You transformed (looks) the Starboard to a Gaastra Vapor. ![]()
Man, I love these "restauration documentaries"!
Awesome job! My fullest respect for that!
I have "recycled" my SB formula for foiling too (fortunately I did not have much more to do than replacing the finbox - which has been done with kind assistance of a pro friend) and from my personal experience I can recommend to all beginner foilers on a budget!![]()
Select to expand quoteSandman1221 said..
Great job on saving an old board, so how much did the board weight in the end?
It's still a bit wet from yesterday but it came in at 11.7kg which is quite heavy! I was hoping for less but a few mistakes with my repairs meant I had to add a lot of unnecessary material. If I knew what I was doing it would easily be a kilo or two lighter.
Select to expand quoteZeroVix said..
Good that it didn't find its way into the landfill. Did you replace with a foil box or just reinforced? I think that I would have put EVA on the complete rear half of board. You transformed (looks) the Starboard to a Gaastra Vapor. ![]()
I had the same idea with the EVA but my sheet wasn't wide enough. I have enough left over to add a fifth piece if I feel like I need it but I found it to be fine yesterday.
The finbox was just reinforced. I'm pretty light so it should be fine.
Great job, not too heavy, mine unrestored was about 10.5 kgs. For the future make sure to never spray polyurethane paints unless you have a full safety suit, not just a dust mask. You can easily add a little thinner and use the roller and then quickly go over with a brush to smooth the orange peel effect.
Nice job. I am on season 4 with an old Starboard formula board. Have fun with it.